
Introduction
In today's rapidly-changing digital world email isn't just a means of communicating, it's an the perfect opportunity for automation.
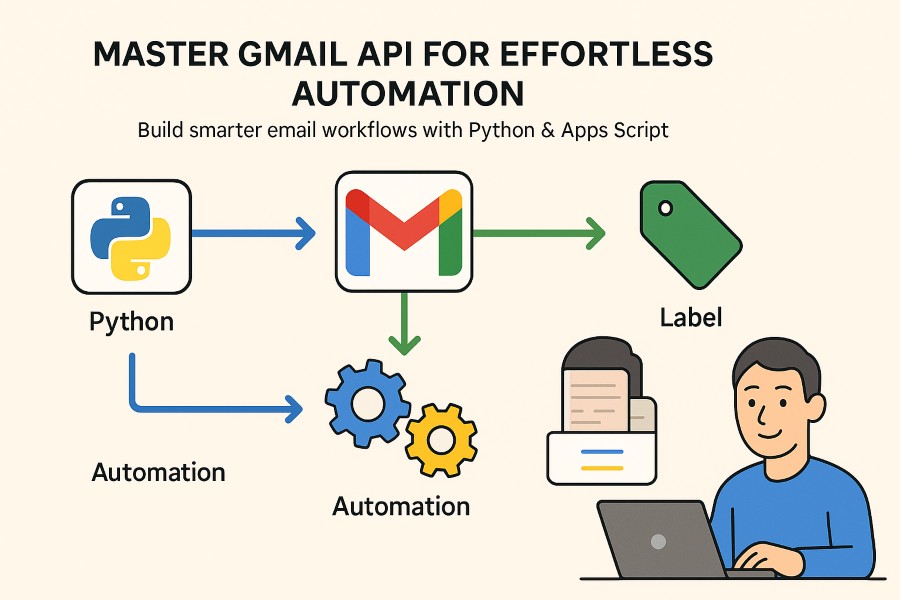
Gmail API gives you the ability to programmatically access Gmail and let developers automate tasks like sending messages, organising inboxes, labeling messages, or connecting Gmail into customized applications and tools. When you're developing intelligent workflows for email or synchronizing Gmail and your CRM or simply trying to streamline routine tasks and tasks, this Gmail API is the best choice.
This guide is intended for both technical developers as well as newbies who wish to make use of Gmail's backend. We'll help you set up the Gmail API app in the Google Developer Console and guide you through connecting to Python and look at some examples of automated processes you can begin using as soon as you are ready.
Plus: We've included a instructional video that you can watch in the post to guide you visually, step-by-step.
Let's take a dive and revolutionize the way you use Gmail.
Understanding the Gmail API
Before we get into the setup process we'll look at the details of what the Gmail API actually is, and why it's a major game changer.
In essence, the Gmail API is a RESTful interface offered by Google that allows you to use and control Gmail mailboxes using a programming language. Instead of having to navigate the Gmail web application you can create codes (like Python scripts) that can read emails and send draft messages. Apply or remove labels Manage inboxes Organize inboxes Manage attachments, threads and much more
Contrary to the traditional protocols such as IMAP or SMTP, which are traditional protocols like IMAP or which are primarily used for the sending and receiving of messages, the Gmail API allows the ability to integrate into Gmail's native functions. It means that you can automate certain Gmail tasks in a single step and without the need for clunky workarounds.
What is the significance of this?
- Developers This opens the door to create smarter dashboards, apps or tools that integrate with Gmail.
- For companies: It allows automation that can improve workflows of teams that range from automated response to emails, through ticket administration.
- For the curious This is a great place to test automated scripts, custom scripts and productivity tricks.
When you're done with this tutorial you'll know more than how to use the Gmail API -- you'll be able to create real-world automated systems with it.
👉🏽Whether you're a developer or just getting started, Gmail automation can be achieved through various methods. Besides using the Gmail API with Python, many also automate their Gmail inbox with Google Sheets and Apps Script to simplify workflows without deep coding.
Prerequisites
Before you start creating Gmail API, before you begin setting up Gmail API, make sure that you have the right things in place. Don't fret -- even in the event that you're not familiar with APIs the process is achievable with a bit patience.
What You'll Need
- An Google Account
You'll be working within Google's ecosystem. Therefore, you'll need an Gmail account that is API-enabled (basically the same as a regular Google accounts). - A Basic Python Knowledge
We'll be using Python as our primary language to interact via Google's Gmail API. If you're able to install and execute scripts, you're ready to start. - Google Cloud Project Access
You'll configure everything using Google Developer Console. Google Developer Console which lets you develop projects, set up APIs and manage credentials. - A familiarity with APIs and OAuth 2.0 (Optional however helpful)
While we'll go over the steps involved, knowing the way OAuth 2.0 functions will allow you to troubleshoot and further extend your automation later.
When you've got the basics in place, you're ready to go into the hands-on setting which will develop the Gmail API app inside Google's developer platform.
Ready? Let's go.
Setting Up a Gmail API App in Google Developer Console
Now it’s time to set up your Gmail API app — the gateway that connects your code to Gmail.
Follow these steps carefully, and you’ll have a working app ready for Gmail automation in no time.
Step 1: Access Google Developer Console
Go to the Google Developer Console. Log in with your Google account if you aren’t already.
Step 2: Create a New Project
👉🏽Click on the project dropdown (top navigation bar) and hit New Project.
👉🏽Give it a name (e.g., “Gmail API Automation”) and click Create.
Step 3: Enable the Gmail API
💠Inside your new project, go to APIs & Services > Library.
💠Search for Gmail API.
💠Click it, then hit Enable.
Step 4: Configure OAuth Consent Screen
💠Go to APIs & Services > OAuth consent screen.
💠Select External (for most use cases).
💠Fill in the required app info: App name, support email, developer contact.
💠You can skip adding test users for now (if just testing with your own account).
Step 5: Create OAuth 2.0 Credentials
💠Go to APIs & Services > Credentials.
💠Click Create Credentials > OAuth client ID.
💠Choose Desktop App (for local testing) or Web Application (if integrating into a web app).
💠Download the generated credentials.json file — this file will be essential when connecting from Python.
Pro Tips
✅ Label things clearly in the console so you don’t mix up projects later.
✅ Keep your credentials secure — never share your credentials.json publicly.
✅ If you plan to go live (beyond testing), make sure you verify your app to avoid user warnings.
Once this setup is complete, you’re ready to jump into code — where the real Gmail automation begins.
👉🏽 While the Gmail API offers powerful programmatic access to Gmail, you can also explore Gmail automation using Apps Script for simpler workflow tasks within Google Workspace.
Connecting Gmail API with Python
Now that your Gmail API app is set up, it’s time to bring it to life using Python. This section covers the full process — from installing the right packages to authenticating and sending your first request.
✅ Step 1: Install Required Python Libraries
Open your terminal or command prompt and run:
pip install --upgrade google-api-python-client google-auth-httplib2 google-auth-oauthlibThese libraries handle authentication and Gmail API communication.
✅ Step 2: Set Up Your Python Script
Create a new Python file, for example, gmail_connect.py, and start with the following code:
import os.path
import base64
from email.mime.text import MIMEText
from google.auth.transport.requests import Request
from google.oauth2.credentials import Credentials
from google_auth_oauthlib.flow import InstalledAppFlow
from googleapiclient.discovery import build

# If modifying these SCOPES, delete the token.json file.
SCOPES = ['https://www.googleapis.com/auth/gmail.send']

def main():
    creds = None
    if os.path.exists('token.json'):
        creds = Credentials.from_authorized_user_file('token.json', SCOPES)

    if not creds or not creds.valid:
        if creds and creds.expired and creds.refresh_token:
            creds.refresh(Request())
        else:
            flow = InstalledAppFlow.from_client_secrets_file('credentials.json', SCOPES)
            creds = flow.run_local_server(port=0)
        with open('token.json', 'w') as token:
            token.write(creds.to_json())

    service = build('gmail', 'v1', credentials=creds)

    # Create email message
    message = create_message("me", "recipient@example.com", "Test Subject", "Hello from Gmail API!")

    # Send the email
    send_message(service, "me", message)

def create_message(sender, to, subject, message_text):
    message = MIMEText(message_text)
    message['to'] = to
    message['from'] = sender
    message['subject'] = subject
    raw_message = base64.urlsafe_b64encode(message.as_bytes()).decode()
    return {'raw': raw_message}

def send_message(service, user_id, message):
    try:
        sent_message = service.users().messages().send(userId=user_id, body=message).execute()
        print(f"Message sent! ID: {sent_message['id']}")
    except Exception as error:
        print(f"An error occurred: {error}")

if __name__ == '__main__':
    main()
🔒 A Quick Note on Security
- The credentials.json file should remain private.
- token.json stores your OAuth token — do not share this.
- Only give the script the minimum required scopes (gmail.readonly, gmail.send, etc.) depending on what your app needs.
This script does a full OAuth 2.0 flow, stores your token for future runs, and sends a test email using the Gmail API.
When you run it, your browser will pop up asking for permission. After granting access, your token will be saved locally.
Automating Gmail Tasks
Once you’ve got your Python script connected to the Gmail API, you’re no longer limited to basic sending. Here’s where the fun starts — you can automate and customize your Gmail experience in powerful ways.
Here are some real-world automations you can build:
⚡ 1. Auto-Label Incoming Emails
Instead of manually organizing your inbox, use the API to apply labels (e.g., “Invoices,” “Client Requests”) based on sender, subject, or content.
def add_label(service, msg_id, label_id):

    msg_labels = {'addLabelIds': [label_id]}

    service.users().messages().modify(userId='me', id=msg_id, body=msg_labels).execute()
✅ Use case: Automatically tag all emails from a specific client or system.
⚡ 2. Build an Email Digest
Fetch the latest emails, extract summaries, and compile them into a daily or weekly report you can send to yourself or your team.
✅ Use case: Morning digests for sales leads, support tickets, or newsletter mentions.
⚡ 3. Bulk Archive or Delete
Write a script to search for emails older than a certain date or with a specific label, then archive or delete them in bulk.
✅ Use case: Clean up old promotions or updates without lifting a finger.
⚡ 4. Auto-Reply Bots
Set up an automated responder for specific conditions, like when you’re out of office or when certain keywords appear in a message.
✅ Use case: Custom auto-replies for job applications, support requests, or event RSVPs.
⚡ 5. Sync Gmail with External Tools
Integrate Gmail with your CRM, project management system, or custom dashboard to keep everything in sync automatically.
✅ Use case: Push incoming sales leads directly into your CRM or create tasks based on emails.
Best Practices and Security Tips
The Gmail API offers powerful automation capabilities however, it is a serious responsibility. To ensure that your projects remain safe effective, efficient, and adaptable, you must follow these best methods.
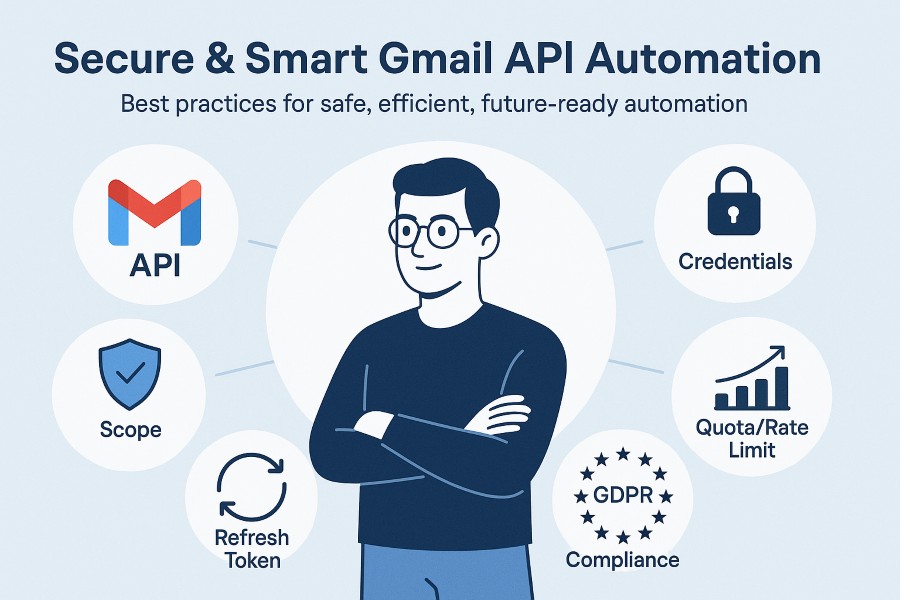
1. Protect Your Credentials
- Do not make a commitment to commit credentials.json and token.json or token.json to GitHub or other repositories that are public. Make use of .gitignore to block sensitive files.
- Keep secrets safe Consider setting up environment variables and a secret manager for setting up production.
2. Use Minimum Required Scopes
- Make sure you request only the areas your application actually requires (e.g., gmail.readonly or. gmail.modify).
- This minimizes the harm if credentials compromised, and is in line with the principle of the least privilege.
3. Handle API Quotas and Rate Limits
- Google has daily limit quotas as well as rates limits for Gmail API. Gmail API.
- Always look for your API's responses to ensure there are no errors, such as 403 rate limit exceeded and create retries using an exponentially high backoff.
4. Refresh Tokens Properly
- OAuth tokens run out, and you should ensure that your application is able to refresh the tokens on a regular basis with the stored refresh token.
- Do not force users to sign in unnecessarily.
5. Log and Monitor Your Scripts
- Record the API response and any errors, to assist in debugging.
- Install monitoring (e.g. by using log tools and alerting system) in the event that you're automating on a regular basis or in a larger the scale.
6. Stay Compliant
- In the event that you're processing customer or user data adhere to the privacy law (like GDPR or the CCPA).
- Be sure to declare the API's use in your app's conditions in the event that you're going to distribute it.
When you follow these guidelines by following these best practices, you're not just creating something that's functional but you're creating something that is ethical, reliable and future-proof.
Final Thoughts & Resources
The Gmail API is one of the most versatile tools you can add to your automation and productivity stack. Whether you’re a solo developer experimenting with Gmail automation or an engineering team integrating email flows into your products, the API offers robust, scalable capabilities.
With just a bit of Python, you can:
✅ Send custom emails programmatically
✅ Organize and manage your inbox automatically
✅ Integrate Gmail with external systems
✅ Build powerful tools on top of Google’s infrastructure
%201.png)

%201.png)

%201.png)